Bonus guide: Odroid XU Setup Guide
Difficulty: Intermediate
Status: Not tested v3
Table of contents
This guide describes how to setup RaspiBolt using an Odroid XU4 or compatible hardware (like Odroid HC1, HC2 and many others).
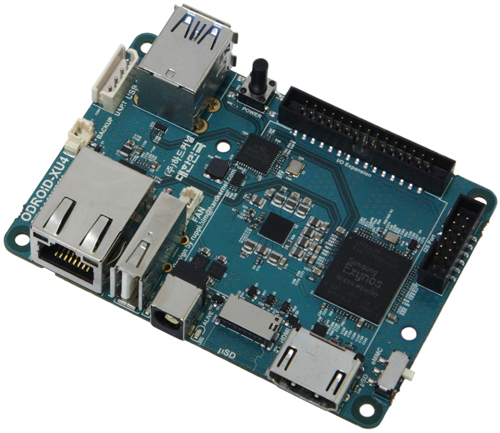
The Odroid series is an alternative low-cost, light-weight computer based on ARM processors. There are a series of computers available at the manufacturer Hardkernel. The Odroid XU4 is roughly in the same league as the Raspberry Pi4 when it comes to computing power and price.
This guide aims to provide an end-to-end solution to install on Odroid. Nevertheless, it is recommended to review the original RaspiBolt guide for the Raspberry Pi, to help you understand the origins of this guide and its deviations.
At this point, this guide only includes the Bitcoin Node setup. Lightning might follow later.
Preparations
You need:
- Odroid XU4 or comparable platform
- microSD card: 8 GB or more, incl. adapter to your regular computer
- external hard disk: 500 GB or more (1 TB SSD recommended)
- optional: Odroid case
- LAN cable
Operating System / Linux
You will install a Linux distribution that is compatible with the Odroid XU4 platform. See Odroid XU4 Downloads
The node runs headless, that means without keyboard or display, so the operating system Ubuntu Minimal is used.
- Write down the user and password for Ubuntu Minimal from the link above.
- Download the Ubuntu Minimal disk image file
- Write the disk image file to your SD Card using a Etcher or similar OS flashing software
Initial boot
Now it’s time to boot your Odroid for the first time.
- Insert the newly flashed SD card into your Odroid
- Connect the Odroid via LAN cable to your router
- Connect the Odroid to the power supply and wait a few min
- Search for the IP address of your Odroid and write it down. You can do this by using the admin backend of your router and locate your Internet device. If your router allows, ensure that your Odroid will continue to use the same IP address. You might find a checkbox that is called “Always assign this network device the same IP address”
- Connect to your Odroid via ssh
- Open the terminal application on your computer. This can also be called cmd or bash.
ssh root@<your Odroid IP>- Enter password from download website
- You should see the Ubuntu Welcome screen
User Setup
We will us the user ‘bitcoin’ to run all bitcoin services
sudo adduser bitcoin- Set password and write it down
Security Hardening
Out of the box Ubuntu is not super secure and the root password we have used so far is public. Let’s secure some things. Note that at this point the security hardening is minimal with room for future expansion.
- Change root user password:
sudo password root- Set new password and write it down
- Ban brute force attacks with fail2ban:
- Install:
sudo apt install fail2ban - Check that it runs:
service fail2ban status - Exit with Ctrl-C
- Install:
- Install Tor for anonymous connectionions:
- Install curl, which was missing on the Ubuntu distribution:
sudo apt updatesudo apt install curl
- Check Tor signature:
curl https://deb.torproject.org/torproject.org/A3C4F0F979CAA22CDBA8F512EE8CBC9E886DDD89.asc | gpg --importgpg --export A3C4F0F979CAA22CDBA8F512EE8CBC9E886DDD89 | sudo apt-key add -- You should get an ‘OK’ message
- Install Tor
- Install:
sudo apt install tor - Check version:
tor --version - Check Tor is running:
systemctl status tor - It should say ‘active…’
- Install:
- Install curl, which was missing on the Ubuntu distribution:
Odroid Start and Stop
You will likely let your Odroid run at all times. These are some helpful commands to get in and out of your Odroid:
- Connect to your Odroid:
ssh root@<your Odroid IP>- Enter password from download website
- Disconnect (keeping your Odroid running):
exit- This ends your terminal session. Alternatively you can just closed your terminal window
- Reboot your Odroid, this is a restart that will require a few minutes to boot the OS:
reboot
- Shutdown your Odroid. This will safely shut your device down as there is now power button on the Odroid. You will need to disconnect and reconnect your power supply to start again:
shutdown
Bitcoin Node
Now that our Odroid OS is running, we want to install a full Bitcoin node with the Bitcoin Blockchain on the Odroid. The blockchain is continuously growing with every block, see chain size, hence we will use the hard disk for the blockchain data.
Prepare Hard Disk
If you haven’t connected your hard disk yet, please connect it now after you shutdown your Odroid and disconnected it from the power supply.
- Find name of your disk:
ls /dev/sd*. - You will see something like “/dev/sda /dev/sda1”, since this is the only hard disk connected to your Odroid.
- Remove previous partitions if this disk was in use before:
fdisk /dev/sda- In the Command prompt enter ‘d’ for delete and ‘w’ to write this change to the disk
- Add your new partition:
fdisk /dev/sda- In the Command prompt enter ‘n’ to add a new partition and ‘w’ to write this change to the disk
- Create a new Ext4 File sytem in this partition with
sudo mkfs.ext4 /dev/sda1
Mount Hard Disk
Now that the hard disc is partitioned and formatted, we need to mount it so that the Odroid can use it:
- Create a new directory to mount the disk
sudo mkdir /mnt/ext - Copy the UUID from the disk by running
lsblk -o NAME,MOUNTPOINT,UUID,FSTYPE,SIZE,LABEL,MODEL - The UUID looks like this: UUID: be4g3a3d-90d5-45jf-9909-an608304c53b
- Edit the fstab file to enter the disks UUID:
sudo nano /etc/fstab - Add this line in the file editor: “UUID=
/mnt/ext auto nosuid,nodev,nofail,x-gvfs-show 0 0" - To save the file enter Ctrl-X, then ‘Y’, then hit ‘Enter’
- Test your entry by mounting the disk
sudo mount -a - Reboot the Odroid with
rebootand log back in - Check disk with
df -h /mnt/ext - You should see something like this
- Filesystem Size Used Avail Use% Mounted on
- /dev/sda1 687G 73M 652G 1% /mnt/ext
Download Bitcoin Core
Now the hard disk is ready to receive the Bitcoin Blockchain data. We want to use the ‘bitcoin’ user to carry out all bitcoin related operations in the background. Let’s set it up:
- Set the bitcoin user as the owner for the newly mounted disk:
sudo chown -R bitcoin:bitcoin /mnt/ext/ - Navigate to mounted hard disk
cd /mnt/ext - Create bitcoin folder
mkdir bitcoinThis is where the blockchain data will be stored - Navigate to temp folder, this is where we keep temporary downloads:
cd /tmp - Download Bitcoin Core
wget https://bitcoincore.org/bin/bitcoin-core-0.21.0/bitcoin-0.21.0-arm-linux-gnueabihf.tar.gzConsider browsing bitcoincore.org to check if there is a more recent version available and update the URL accordingly - Download Bitcoin Core checksum:
wget https://bitcoincore.org/bin/bitcoin-core-0.21.0/SHA256SUMS.asc(again, check the latest version and update URL) - Download a known reference checksum:
wget https://bitcoin.org/laanwj-releases.asc - Compare reference with real checksum:
sha256sum --check SHA256SUMS.asc --ignore-missingYou should get something like “bitcoin-0.20.1-arm-linux-gnueabihf.tar.gz: OK”
Now you can trust the files that you have downloaded and can continue to extract and use Bitcoin Core.
- Extract Bitcoin Core compressed file:
tar -xvf bitcoin-0.21.0-arm-linux-gnueabihf.tar.gz(again, validate version in URL) - Install it:
sudo install -m 0755 -o root -g root -t /usr/local/bin bitcoin-0.21.0/bin/*(check URL) - Check the bitcoin daemon version:
bitcoind --version
Prepare data directory
Now we use the bitcoin user going forward to run all Bitcoin Core related processes:
- Switch to bitcoin user
sudo su - bitcoin - Link to the bitcoin folder:
ln -s /mnt/ext/bitcoin /home/bitcoin/.bitcoin - Check the new home of the bitcoin user:
cd ~and thenls -lashould show the bitcoin folder
Configuration
- Add RaspiBolt configuration:
nano /mnt/ext/bitcoin/bitcoin.confand copy/paste below:
# RaspiBolt: bitcoind configuration
# /mnt/ext/bitcoin/bitcoin.conf

# Bitcoin daemon
server=1
txindex=1

# Network
listen=1
listenonion=1
proxy=127.0.0.1:9050
bind=127.0.0.1

# Connections
rpcuser=raspibolt
rpcpassword=PASSWORD_[B]
zmqpubrawblock=tcp://127.0.0.1:28332
zmqpubrawtx=tcp://127.0.0.1:28333

# Raspberry Pi optimizations
maxconnections=40
maxuploadtarget=5000

# Initial block download optimizations
dbcache=2000
blocksonly=1
Running bitcoind
- Run bitcoind manually
bitcoind - Ctlr-C to stop it
exitto switch back to root User
Autostart on boot
- Edit config file:
sudo nano /etc/systemd/system/bitcoind.service. Copy/paste from below:
$ sudo nano /etc/systemd/system/bitcoind.service
# RaspiBolt: systemd unit for bitcoind
# /etc/systemd/system/bitcoind.service

[Unit]
Description=Bitcoin daemon
After=network.target

[Service]

# Service execution
###################

ExecStart=/usr/local/bin/bitcoind -daemon \
                                  -pid=/run/bitcoind/bitcoind.pid \
                                  -conf=/mnt/ext/bitcoin/bitcoin.conf \
                                  -datadir=/mnt/ext/bitcoin


# Process management
####################

Type=forking
PIDFile=/run/bitcoind/bitcoind.pid
Restart=on-failure
TimeoutSec=300
RestartSec=30


# Directory creation and permissions
####################################

# Run as bitcoin:bitcoin
User=bitcoin
Group=bitcoin

# /run/bitcoind
RuntimeDirectory=bitcoind
RuntimeDirectoryMode=0710


# Hardening measures
####################

# Provide a private /tmp and /var/tmp.
PrivateTmp=true

# Mount /usr, /boot/ and /etc read-only for the process.
ProtectSystem=full

# Deny access to /home, /root and /run/user
ProtectHome=true

# Disallow the process and all of its children to gain
# new privileges through execve().
NoNewPrivileges=true

# Use a new /dev namespace only populated with API pseudo devices
# such as /dev/null, /dev/zero and /dev/random.
PrivateDevices=true

# Deny the creation of writable and executable memory mappings.
MemoryDenyWriteExecute=true

[Install]
WantedBy=multi-user.target
- Enable the service:
sudo systemctl enable bitcoind.service - Link root user:
ln -s /mnt/ext/bitcoin/ /root/.bitcoin - Reboot Odroid:
sudo reboot
Verification of bitcoind operations
Give it a few minutes to reboot, log in again via SSH with user root.
- Check if bitcoind has automatically started after reboot with:
systemctl status bitcoind.service
Explore bitcoind and bitcoind-cli
Now that bitcoind is running, you have various ways to check download progress and look into the blockchain data.
- Look at the tail end of the log file:
tail -f /mnt/ext/bitcoin/debug.log. Ctrl-C to get out of this logging view. This will tell you also the progress of the blockchain download. When you reach near 0.99 or 1.0 you have downloaded 100% of the blockchain and are ‘caught up’ - As the bitcoin user, you can also use the bitcoin-cli to check:
bitcoin-cli getblockchaininfo. bitcoin-cli is very powerful tool, have fun exploring it.
🚨 Please let Bitcoin Core sync fully before proceeding.
This can take up to a week or two when using an Odroid XU4, depending mostly on your external drive (SSD good, HDD bad).
Bitcoin Core upgrade
If you want to upgrade to a new release of Bitcoin Core in the future, check out the FAQ section: How to upgrade Bitcoin Core
Run Bitcoind and Sync Blockchain
Using Bitcoin Node
« Back: + Raspberry Pi