Bonus guide: Electrum Wallet Desktop
Electrum wallet Desktop is a well-established, feature-rich Bitcoin wallet for power-users that supports most hardware wallets.
Difficulty: Easy
Status: Tested v3
![]()
Table of contents
Installation
On your local computer, download, verify and install Electrum Wallet.
- Using the instructions on this page:
- Download the required version for your OS
- Download the signature file
- Verify the signature following the instructions on the page depending on your OS
- Install Electrum Wallet Desktop
Configuration
Force single server Electrum connection to only your node
To preserve privacy, we will constrain Electrum to only connect to a single server (your RaspiBolt). How to do this depends on whether you are connecting via Local Area Network or via Tor and the operating system that you use on your regular computer.
Local connection
If you plan to use Electrum from only within your own secured local area network, you can use the local connection details.
-
Linux
- Execute this command in your Linux terminal to -1 (connect to single server only) -s (server address)
./electrum -1 -s raspibolt.local:50002:s -
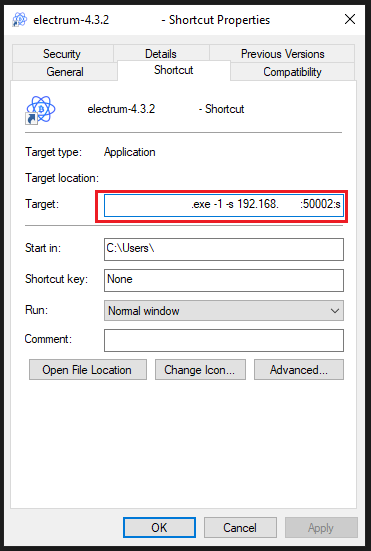
Windows
- Find the new Electrum desktop shortcut, right-click it and go to “Properties”, click shortcut tab at the top bar, in the box named target, put “-1 -s raspibolt.local:50002:s” after “electrum.exe” (replace raspibolt.local with your node IP if necessary)
"C:\Program Files (x86)\Electrum\electrum.exe" -1 -s raspibolt.local:50002:s -
Apply, accept and execute by double-clicking on the new shortcut.
-
macOS
- Execute this command in the Terminal application to -1 (connect to single server only) -s (server address)
/Applications/Electrum.app/Contents/MacOS/run_electrum -1 -s raspibolt.local:50002:s -
After using this command for the first run, close Electrum, and open the Electrum config file with the following customized command:
nano /Users/<YOUR_PERSONAL_COMPUTER_USERNAME>/.electrum/config- and modify the file to include the following lines:
"auto_connect": false,
"oneserver": true,
"server": "raspibolt.local:50002:s",
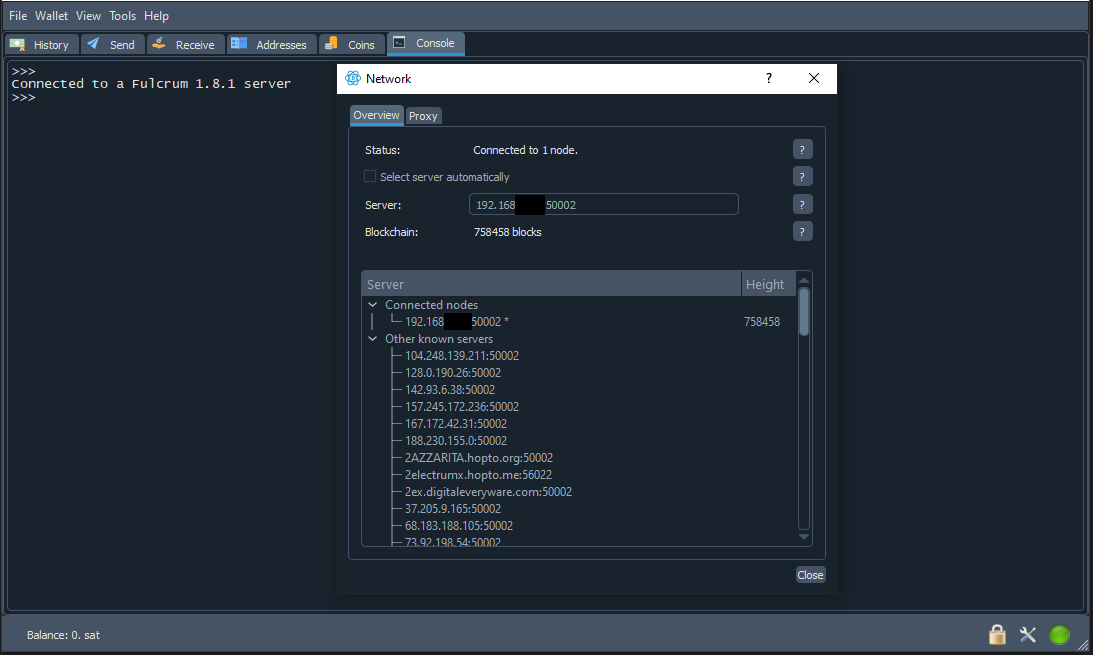
After opening a wallet or creating a new one, Electrum will indicate an active connection to a local server with a green dot in the bottom right corner of the screen.
Remote connection over Tor
To connect over Tor, you will need to have Tor installed on the client computer running Electrum.
By OS:
- Windows: download, install and run Tor Browser
- The application must be started manually and run in the background when you want to connect over Tor.
- By default, when you have Tor Browser running, Tor proxy is available on port
9150, if you want to have9050available too, you can run background service on port9050, executing"tor.exe"file on the installation path route you chose during Tor Browser installation and following the next subpath...\Tor Browser\Browser\TorBrowser\Tor\tor.exe"
-
Linux: only need to execute (
sudo apt install tor) on the command line and ensure that the Tor service is working and listening at the default ports9050and9150$ sudo ss -tulpn | grep tor | grep LISTEN
Expected output:
  tcp   LISTEN 0      4096           127.0.0.1:9050       0.0.0.0:*    users:(("tor",pid=1847,fd=6))
  tcp   LISTEN 0      4096           127.0.0.1:9051       0.0.0.0:*    users:(("tor",pid=1847,fd=7))
-
macOS: download, verify, install, and run Tor Browser
- The application must be started manually when you want to connect over Tor
- By default, when you have Tor Browser running, Tor proxy is available on port 9150
Now we need to specify the Tor address for Electrum Server and the local Tor proxy port in the Electrum Wallet configuration.
First, get the onion address of your Electrum server directly on the RaspiBolt, depending on whether you chose the Electrs or Fulcrum service
-
For Electrs:
$ sudo cat /var/lib/tor/hidden_service_electrs/hostname > ab...yz.onion -
For Fulcrum:
$ sudo cat /var/lib/tor/hidden_service_fulcrum/hostname
> ab...yz.onion.onion
Now, execute Electrum Wallet choosing the correct way depending on your OS (replace “9050” by “9150” if you choose to run the Tor Browser)
-
Linux
- Execute this command in your Linux terminal to -1 (connect to single server only) -s (server address).
./electrum -1 -s ab...yz.onion:50002:s -p socks5:localhost:9050 -
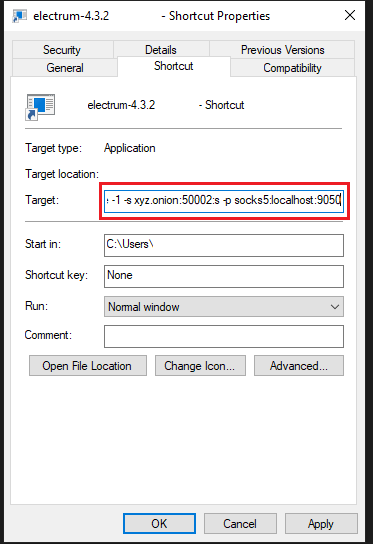
Windows
- With your new shortcut created after installation in Desktop, right-click it and go to properties, click shortcut tab at the top bar, in the box named target put
"-1 -s ab...yz.onion:50002:s -p socks5:localhost:9050"after"electrum.exe", apply, accept and execute doing double-click on our new shortcut
C:\Program Files (x86)\Electrum\electrum.exe -1 -s ab...yz.onion:50002:s -p socks5:localhost:9050 - With your new shortcut created after installation in Desktop, right-click it and go to properties, click shortcut tab at the top bar, in the box named target put
-
macOS
- Open the Tor browser
- In the Terminal application, run the following command
/Applications/Electrum.app/Contents/MacOS/run_electrum -1 -s ab...yz.onion:50002:s -p socks5:localhost:9050
After opening a wallet or creating a new one, Electrum will indicate an active connection to a Tor server with a blue dot in the bottom right corner of the screen.
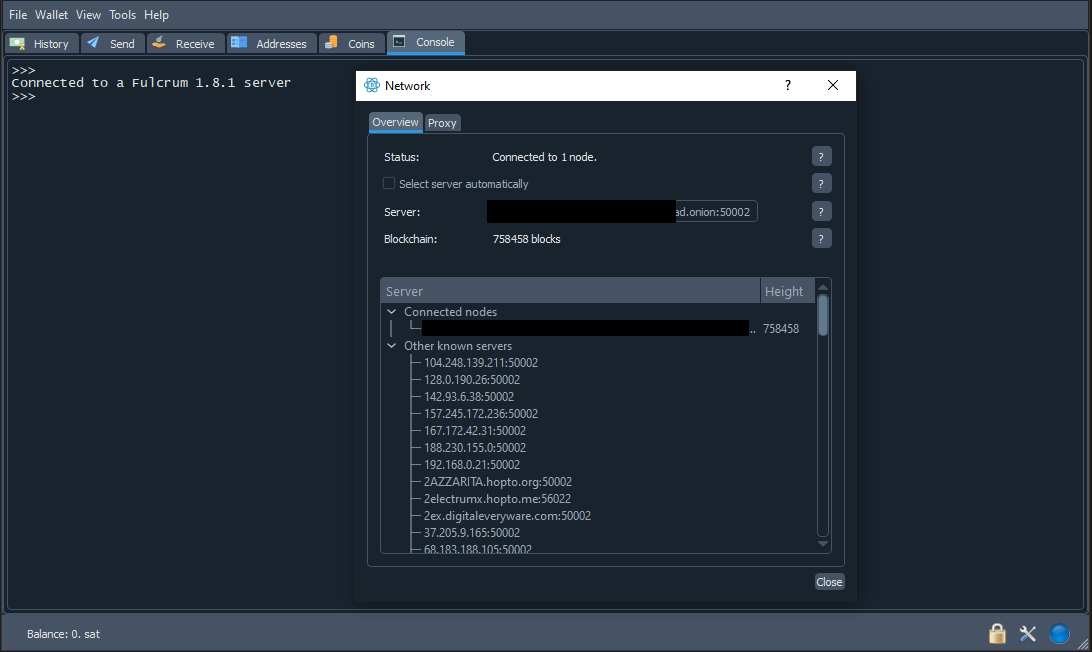
🚨 Try to put check "Use Tor proxy at port 9050" or "Use Tor proxy at port 9150" in "Proxy" settings tab if not connected for you

« Back: + Bitcoin